Cabinet Handle Guide: A Comprehensive Overview (Updated 04/28/2026)
This guide details cabinet handle installation, covering measurements, tools, and styles. Precision and patience are key when swapping or installing new hardware for optimal results.
Cabinet handles are more than just functional hardware; they’re crucial design elements that significantly impact a kitchen or furniture’s aesthetic. Replacing old hardware is a cost-effective way to refresh a space, offering a wide range of styles from modern to traditional. Successful installation requires careful measurement, the right tools, and attention to detail.
Whether installing knobs or pulls, understanding screw lengths and proper placement is essential. Utilizing templates ensures precision, especially when dealing with existing or new holes. This guide provides a comprehensive overview to help you achieve professional results.
Types of Cabinet Handles
Cabinet handles broadly fall into three main categories: knobs, pulls (including bar and D-shaped options), and handles with backplates. Knobs, installed with a single screw, offer simplicity and a classic look. Pulls, secured by two screws, provide a more substantial grip and modern aesthetic.
Handles with backplates are ideal for covering existing holes or adding a decorative element. Choosing the right type depends on your cabinet style, functionality needs, and desired overall appearance.
Knobs
Knobs represent a classic and versatile cabinet hardware choice, typically installed using a single screw for quick and easy application. They suit various kitchen styles, from traditional to contemporary, offering a simple yet elegant touch.
Precision is crucial during installation, ensuring the knob is securely fastened. Consider the knob’s size and shape in relation to your cabinet doors and drawers for a balanced aesthetic.
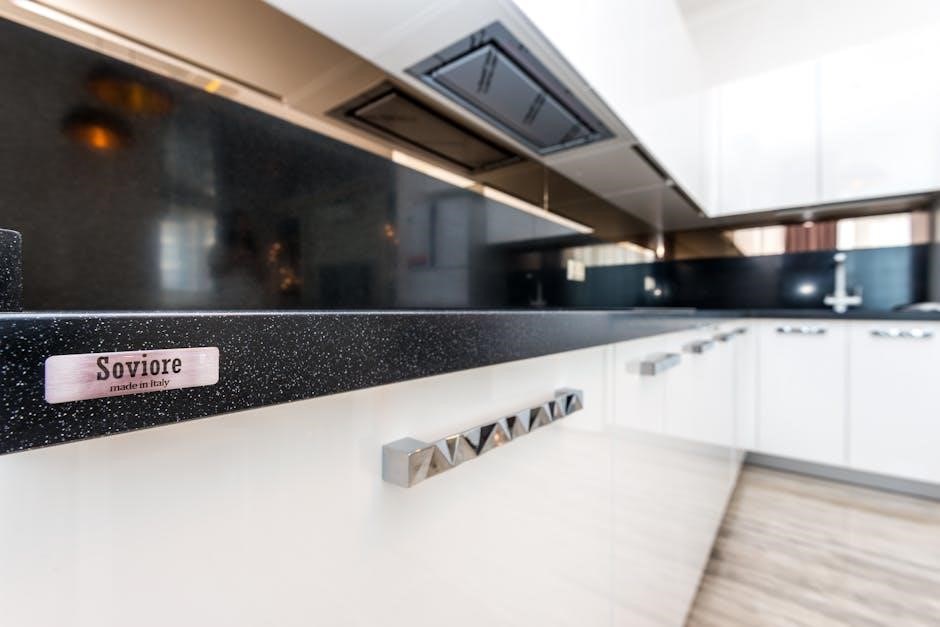
Pulls (Bars & D-Shaped)
Cabinet pulls, encompassing both bar and D-shaped designs, generally require two screws for a secure and stable attachment. These pulls often provide a more substantial grip compared to knobs, making them ideal for larger or frequently used cabinets and drawers.
Accurate measurement and pilot hole drilling are essential for proper alignment. Consider the pull’s length and projection to ensure comfortable access and a cohesive look.
Handles with Backplates
Cabinet handles featuring backplates offer a decorative element while cleverly concealing existing screw holes from previous hardware. This is particularly useful when upgrading cabinets without altering existing hole configurations, saving time and effort during installation.
Backplates provide a clean, finished look and can bridge gaps if new hardware has different spacing requirements. Ensure the backplate’s size complements both the handle and the cabinet door or drawer front.
Materials Used in Cabinet Handle Manufacturing
Cabinet handles are crafted from diverse materials, each offering unique aesthetics and durability. Popular choices include brass, known for its classic appeal and resistance to corrosion, and stainless steel, prized for its modern look and robustness.
Nickel provides a bright, polished finish, while ceramic and glass handles add a touch of elegance. Material selection impacts cost, longevity, and the overall style of your kitchen or cabinetry.
Brass Cabinet Handles
Brass cabinet handles exude timeless elegance, offering a warm, rich aesthetic that complements both traditional and transitional kitchen designs. Known for its durability, brass resists corrosion, ensuring longevity even in humid environments.
Over time, brass develops a beautiful patina, adding character. Polishing brass regularly maintains its shine, while protective coatings prevent tarnishing. Brass handles represent a classic, high-quality choice.
Stainless Steel Cabinet Handles
Stainless steel cabinet handles provide a sleek, modern look that seamlessly integrates into contemporary kitchens. Highly resistant to corrosion, staining, and rust, stainless steel is exceptionally durable and easy to maintain.
Cleaning stainless steel requires only a microfiber cloth to remove fingerprints and smudges. Available in various finishes – brushed, polished, or matte – stainless steel offers versatility. It’s a practical and stylish choice for busy households.
Nickel Cabinet Handles
Nickel cabinet handles offer a warm, inviting aesthetic, often presenting a softer sheen than stainless steel or chrome. Polishing nickel regularly maintains its luster and prevents tarnishing, ensuring a lasting, beautiful finish in your kitchen or bathroom.
Nickel is known for its durability and resistance to corrosion, making it a practical choice alongside its visual appeal. It complements both traditional and transitional design styles, adding a touch of elegance.
Ceramic & Glass Cabinet Handles
Ceramic and glass cabinet handles introduce a unique, decorative element to cabinetry, offering a wide range of colors, patterns, and styles. These materials are best suited for less frequently used cabinets, as they can be more fragile than metal options.
Careful cleaning with gentle detergents is crucial to avoid scratches or damage. They pair beautifully with both modern and farmhouse aesthetics, adding a touch of personality and sophistication.
Measuring for Cabinet Handle Installation
Accurate measurements are paramount for a seamless cabinet handle installation. Begin by measuring existing hole spacing if replacing hardware, ensuring new handles align. Determine the correct screw length based on cabinet door/drawer thickness – too long or short causes issues.
Utilize a cabinet hardware template kit for precision drilling, especially when installing new hardware. These kits accommodate various handle spacings, simplifying the process and minimizing errors.
Measuring Existing Hole Spacing
When replacing cabinet handles, accurately measuring existing hole spacing is crucial. Use a measuring tape to determine the distance between the centers of the screw holes. Template kits often accommodate common spacings like 2-1/2″, 3″, 3-3/4″, 4″, 5″, and 6-1/4″.
Metric spacings of 96mm, 128mm, and 160mm are also frequently encountered. Precise measurement ensures the new handles fit the existing holes, simplifying installation and avoiding new drilling.
Determining Screw Length
Selecting the correct screw length is vital for a secure and aesthetically pleasing cabinet handle installation. Screws should penetrate the cabinet frame sufficiently for a firm hold, but not protrude through the front.
If the provided screws are unsuitable – too long or short – replacements must be sourced. Consider cabinet thickness when choosing screw length to ensure a snug, stable fit without damaging the wood.
Using a Cabinet Hardware Template Kit
Cabinet hardware template kits significantly enhance installation precision, especially when dealing with multiple handles or varying screw spacings. These kits, like the MeasurePro, facilitate accurate drilling for both single-screw knobs and handles with wider configurations.
They accommodate common spacings – 2-1/2″, 3″, 3-3/4″, 4″, 5″, 6-1/4″, and metric equivalents – ensuring proper alignment and minimizing errors during the drilling process for a professional finish.
Tools Required for Installation

Successful cabinet handle installation necessitates a few essential tools. A drill, equipped with appropriately sized drill bits, is fundamental for creating pilot holes and securing the hardware. A screwdriver – manual or electric – is needed to tighten screws effectively.
Precise measurements demand a measuring tape and ruler, while a level ensures handles are perfectly aligned. Having these tools readily available streamlines the process and guarantees a professional outcome.
Drill & Drill Bits
A drill is crucial for creating pilot holes, preventing wood splitting during screw insertion. Select drill bits slightly smaller than the screw diameter for a secure fit. When installing pulls, ensure bits are appropriate for both screw locations.
An electric drill offers speed and efficiency, but a manual drill provides greater control. Precision is paramount; use a slow speed and steady hand to avoid damaging cabinets.
Screwdriver (Manual or Electric)
A screwdriver, either manual or electric, is essential for securely fastening cabinet handles and pulls. Ensure the screwdriver tip matches the screw head type (Phillips, flathead, etc.) to prevent stripping. Electric screwdrivers offer speed and ease, but manual screwdrivers provide better torque control.
Applying consistent pressure while driving screws is vital for a snug, lasting hold.
Measuring Tape & Ruler
Accurate measurements are crucial for successful cabinet handle installation. A measuring tape helps determine existing hole spacing, while a ruler assists in verifying screw lengths and handle placement. Precise measurements ensure proper alignment and prevent installation errors.
Double-check all measurements before drilling or screwing to avoid costly mistakes and achieve a professional finish.
Level
Maintaining level alignment is essential for aesthetically pleasing cabinet hardware. A level ensures knobs and pulls are installed straight, preventing a crooked or unprofessional appearance. Use the level both horizontally and vertically during marking and installation phases.
Consistent leveling across all cabinets contributes to a polished and balanced kitchen or furniture design, enhancing the overall look and functionality.
Step-by-Step Installation Guide: Knobs
Begin by carefully marking the screw location on the cabinet door or drawer, utilizing existing holes if possible for convenience. Next, drill a pilot hole to prevent wood splitting, ensuring it’s appropriately sized for the screw.
Then, gently attach the knob, tightening the screw until snug – avoid over-tightening. Finally, polish the newly installed knob with a microfiber cloth to remove any fingerprints or debris.
Step-by-Step Installation Guide: Pulls
Start by accurately marking the screw locations for the cabinet pull, considering the desired spacing and alignment. Drill pilot holes at each marked spot, ensuring they are correctly sized to accommodate the screws.
Carefully position the pull onto the cabinet, aligning it with the pilot holes, and then attach it using the provided screws. Tighten securely, but avoid over-tightening to prevent damage. Polish with a cloth!
Marking Screw Locations
Precise marking is crucial for pull installation. Utilize a measuring tape to determine the desired center point for the handle, ensuring symmetry. Carefully mark the screw hole locations, referencing the handle’s mounting pattern.
For existing holes, verify alignment before marking. If repurposing, use the old holes as guides. Double-check measurements to prevent misalignment, guaranteeing a professional and aesthetically pleasing result. Accuracy is paramount!

Drilling Pilot Holes
Before screwing in pulls, drill pilot holes. Select a drill bit slightly smaller than the screw diameter to prevent wood splitting. Drill straight and slowly, maintaining a consistent angle. Pilot holes guide the screws, ensuring a secure and flush fit.
Depth is key – drill only as deep as the screw length. Using a template kit aids precision, especially for wider handles. This step minimizes resistance and simplifies handle attachment, resulting in a professional finish.
Attaching the Handle
With pilot holes drilled, carefully align the handle with the marked locations. Insert the screws through the handle and into the pilot holes. Use a screwdriver – manual or electric – to tighten the screws gradually and evenly.
Avoid over-tightening, which can strip the screws or damage the cabinet. Ensure the handle sits flush against the cabinet surface. Finally, polish the installed hardware with a microfiber cloth to remove any fingerprints or debris.
Addressing Existing Hole Issues
When replacing hardware, existing holes may not align with new handles or pulls. Utilize backplates to effectively cover these old holes, providing a clean look and secure mounting surface for the new hardware. Alternatively, fill the unwanted holes with wood filler, allowing it to dry completely;
Subsequently, sand the filled areas smooth and carefully redrill new pilot holes for precise hardware placement, ensuring a professional finish and stable installation.
Using Backplates to Cover Old Holes
Backplates offer a simple solution when new cabinet hardware doesn’t match existing hole configurations. These decorative plates mount behind knobs or pulls, concealing previous screw locations and providing a fresh mounting point. They’re particularly useful when transitioning between different handle styles or spacing.
Ensure the backplate’s size complements the hardware and cabinet door. Securely attach the backplate before installing the handle or pull for a stable, aesthetically pleasing result.
Filling and Redrilling Holes
When backplates aren’t ideal, filling old screw holes is necessary for a clean installation. Use wood filler, carefully applying it to the existing holes and allowing it to dry completely. Sand the filler flush with the cabinet surface for a smooth finish.
Once prepared, precisely mark and drill new pilot holes for your hardware. This ensures a secure fit and prevents splitting the wood, resulting in a professional-looking outcome.
Cabinet Hardware Placement Considerations
Strategic placement enhances both aesthetics and functionality. Standard heights for knobs and pulls vary, but consistency is crucial for a unified look. Consider cabinet type – base cabinets often benefit from slightly lower placements than wall cabinets.
Ultimately, placement aligns with personal taste; there isn’t a strict right or wrong. Careful consideration during the design phase ensures a harmonious and user-friendly kitchen space.
Standard Knob & Pull Heights
Generally, knobs and pulls are positioned to optimize comfort and visual balance. A common guideline places them centered vertically on cabinet doors and drawers. For base cabinets, 2.5 to 3 inches from the cabinet bottom is typical, while wall cabinets often sit around 2 to 2.5 inches.
These are starting points; adjust based on cabinet size and personal preference to achieve a pleasing and ergonomic design.
Placement for Different Cabinet Types (Base, Wall)
Cabinet hardware placement varies depending on the cabinet’s function. Base cabinets, frequently accessed, benefit from pulls positioned for easy gripping while standing. Wall cabinets, often reached higher, may favor knobs or pulls slightly lower for comfortable access.
Consider the user’s height and typical reach when determining optimal placement. Consistency across similar cabinet types enhances the kitchen’s overall aesthetic.
Troubleshooting Common Installation Problems
Installation isn’t always seamless; common issues arise. Stripped screws can be addressed with larger screws or wood glue and toothpicks. Misaligned handles require careful re-marking and drilling, ensuring precise pilot holes.
Loose handles often indicate incorrect screw length; replace with appropriately sized screws. Patience and attention to detail are crucial for resolving these problems and achieving a secure, polished finish.
Stripped Screws
Encountering stripped screws during installation is frustrating, but solvable. A common fix involves replacing the original screws with slightly larger ones, providing a tighter grip within the hole. Alternatively, insert wood glue and toothpicks into the hole before re-screwing.
Allow the glue to dry completely for a secure hold. Avoid over-tightening, which can re-strip the screw, and always use the correct screwdriver size.
Misaligned Handles
Misaligned cabinet handles detract from a polished look, but are often easily corrected. Loosen the screws slightly, allowing for adjustment. Carefully reposition the handle to achieve perfect alignment, ensuring it’s level and symmetrical with others.
Retighten the screws gradually, checking alignment frequently. If holes are significantly off, consider filling and redrilling for a precise fit, prioritizing a clean aesthetic.
Handles Feel Loose
Loose cabinet handles can indicate a problem with the screws or the mounting holes. First, try tightening the existing screws; however, avoid over-tightening, which can strip the holes. If the screws spin freely, the holes may be too large.
Consider using longer screws or wood filler to create a more secure grip. Toothpicks and wood glue can also provide a temporary fix before a more permanent solution is implemented.
Cleaning and Maintaining Cabinet Handles
Regular cleaning preserves the beauty and longevity of your cabinet handles. For brass and nickel, use a polishing cloth to remove tarnish and restore shine. Stainless steel benefits from a damp microfiber cloth, wiping with the grain to avoid streaks.
Remove fingerprints and smudges promptly with a mild cleaning solution. Avoid abrasive cleaners, which can damage finishes. Consistent care ensures your hardware remains pristine for years.
Polishing Brass & Nickel
Brass and nickel cabinet handles require periodic polishing to maintain their luster. Use a dedicated brass or nickel polish and a soft cloth, applying in gentle circular motions. Buff thoroughly to remove tarnish and reveal the original shine.
For light cleaning, a damp cloth can remove fingerprints. Avoid harsh chemicals, as they can damage the protective coating. Regular polishing prevents buildup and preserves the handles’ appearance.
Cleaning Stainless Steel
Stainless steel cabinet handles are durable but show fingerprints and smudges easily. Clean with a microfiber cloth and warm, soapy water, wiping in the direction of the grain to avoid scratches. For stubborn marks, use a stainless steel cleaner specifically designed for hardware.
Avoid abrasive cleaners or steel wool, which can damage the finish. Dry thoroughly to prevent water spots and maintain a sleek appearance.
Removing Fingerprints & Smudges
Cabinet handles frequently accumulate fingerprints and smudges from daily use. Regularly wipe down handles with a clean, damp microfiber cloth to remove these marks. For more persistent smudges, a mild dish soap solution can be effective, followed by a clean water rinse.
Always dry the hardware thoroughly to prevent water spots and maintain a polished look. Consistent cleaning keeps your cabinets looking their best!
Choosing the Right Style for Your Kitchen
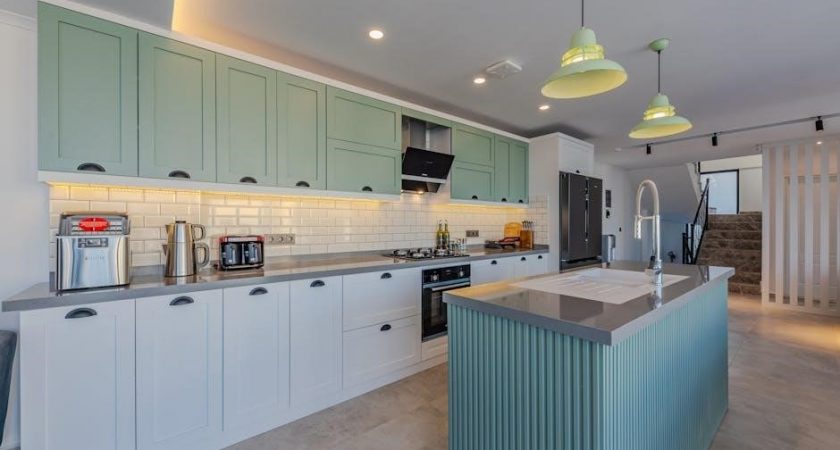
Selecting cabinet handles involves balancing aesthetics and functionality. Consider whether your kitchen leans towards modern or traditional styles; sleek pulls suit modern spaces, while knobs complement traditional designs.
Matching handles to cabinet color is also crucial – contrasting colors create a bold statement, while complementary shades offer a more subtle look. Don’t be afraid to experiment!
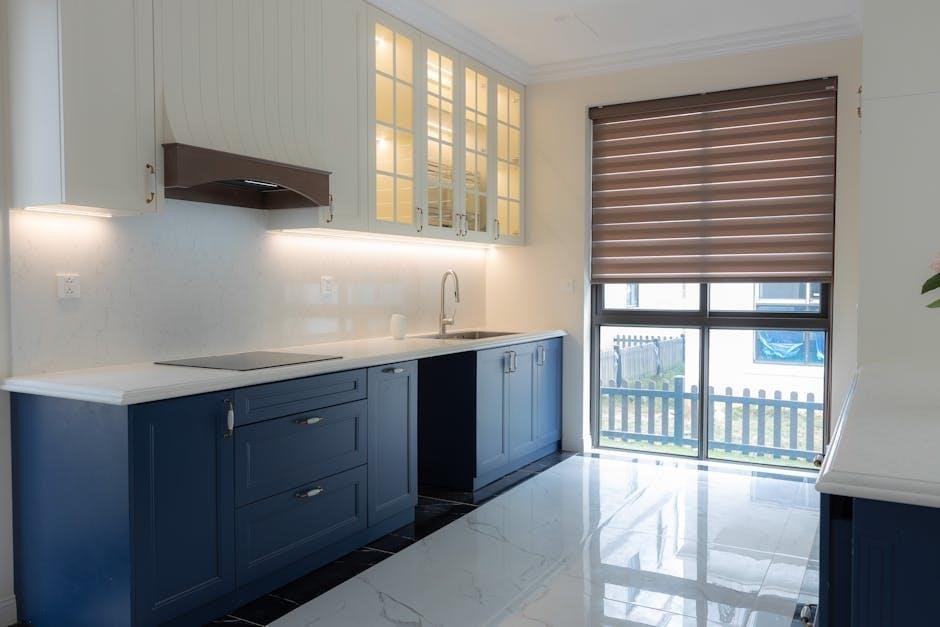
Modern vs. Traditional Styles
Modern kitchens often benefit from minimalist cabinet hardware. Sleek, streamlined pulls with clean lines and brushed metal finishes – like stainless steel or nickel – are popular choices. Conversely, traditional kitchens frequently feature knobs or pulls with ornate details.
Brass and ceramic handles evoke a classic feel. Ultimately, the style should harmonize with your kitchen’s overall design, creating a cohesive and inviting space.
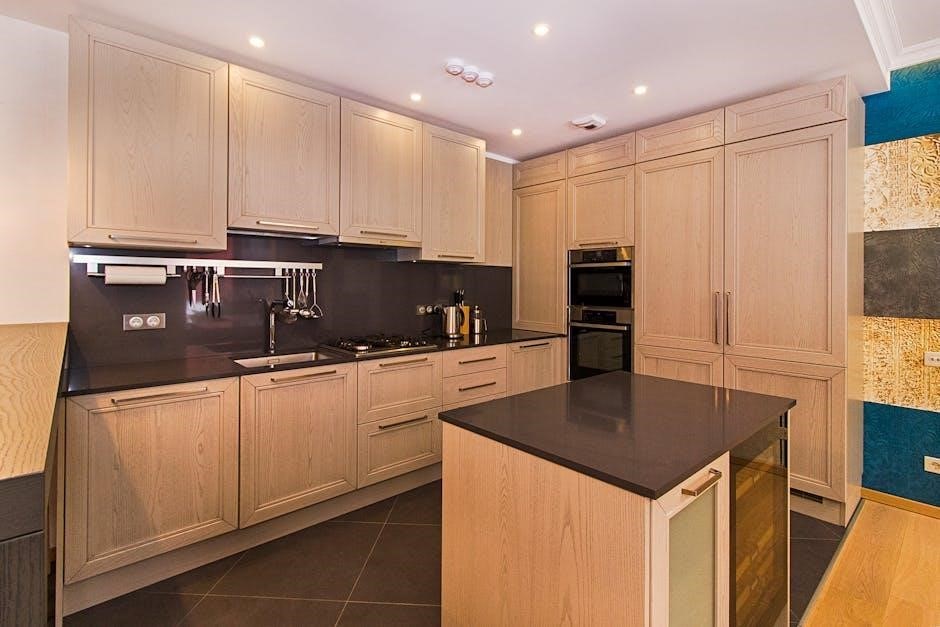
Matching Handles to Cabinet Color
Cabinet color significantly impacts handle selection. For darker cabinets, consider brighter metallic finishes like polished chrome or brass to create contrast and visual interest. Lighter cabinets pair well with softer tones – brushed nickel, oil-rubbed bronze, or even matte black.
Monochromatic schemes, using similar shades, can also be effective, offering a subtle and sophisticated look. Consider your kitchen’s overall aesthetic.
Budget Considerations for Cabinet Handles
Cabinet handle costs vary widely by material and style. Basic plastic or standard chrome options are the most affordable, while brass, stainless steel, and intricate designs increase the price. Expect to spend anywhere from $3 to $30+ per handle.
Finding affordable options involves shopping sales, exploring online retailers, and considering bulk purchases to reduce the overall cost of your kitchen upgrade.
Cost Range of Different Materials
Material significantly impacts handle pricing. Plastic options typically range from $1-$5 per handle, while basic zinc alloy pulls are around $2-$8. Stainless steel falls in the $5-$15 range, offering durability. Brass handles, known for their classic look, can cost $10-$30+ each.
Ceramic and glass handles, often decorative, generally range from $8-$25, depending on complexity and artistry.
Finding Affordable Options
Budget-conscious renovators have several avenues. Online retailers often offer competitive pricing and frequent sales, especially during seasonal events. Consider exploring wholesale suppliers for bulk discounts if undertaking a large project. Don’t dismiss slightly imperfect or discontinued styles – they can offer substantial savings.
Comparing prices across multiple vendors is crucial. Look for sales and clearance items to maximize your budget!